Quantcast
Channel: faultbucket
Viewing all 108 articles
Browse latest View live

WordPress 403 error when saving post

$
0
0

While writing my last post, I encountered a strange error with WordPress. I had written up the majority of my post, and went to save the draft and received this error:

403 error from wordpress

I tried copying and pasting my text into a new post, and it still gave the error.

I found I could still type a few words and save a draft, so I began experimenting with the remaining text of my post that hadn’t been saved yet.

Eventually I stumbled across the word “web dot config” like this (can’t type it obviously)


When this was included in the body of my post, it would not save. This is a really hard item to come up with accurate search terms for, so I couldn’t find any specific references of anyone else having and solving this problem. I suspect it has something to do with the .htaccess and re-write rules configured within WordPress.


ADFS 2.0 renew Service Communications certificate

$
0
0

I’ve recently solved a problem with the help of Microsoft Premier Support that didn’t have any references online that I could find.

Looking at the ADFS console under Certificates, the “Service Communications” section had a message of “Certificate not found in store”.

Connecting to the certificate store showed a proper external SSL cert for our UAT ADFS DNS name. Trying the option “Set Service Communications Certificate” in ADFS produced the error:

The Certificate could not be processed.
Error message: Object reference not set to an instance of an object.

This error led me to this discussion on the Microsoft forums, with the following command to attempt:

AddPsSnapin Microsoft.Adfs.PowerShell SetAdfsCertificate CertificateType “Service-Communications” Thumbprintaa bb cc dd …”

However, when I tried to run this command I repeatedly got the following error:

The type initializer for 'Microsoft.IdentityServer.Dkm.ADRepository' threw an exception. Microsoft.IdentityServer.PowerShell.Commands.SetCertificateCommand

The resolution: run PowerShell as the ADFS service account, and then use the command above to set the certificate. After this, I was able to restart the ADFS service and the console displayed the certificate properly.

I also needed to update the certificate on the ADFS proxy in IIS to get a successful result from the Microsoft Remote Connectivity Analyzer.

Exchange Online PowerShell access denied

$
0
0

I am attempting to test aspects of Office 365 Modern Authentication in a UAT environment prior to enabling it within our production Tenant.

Part of this work is testing the Exchange Online PowerShell access, as there is quite amount of automation configured in our environment and we want to ensure it doesn’t break. I’ve read it “shouldn’t”, but that’s a dangerous word to trust.

Until now I’ve been unable to make the PowerShell connection to Exchange Online in our UAT environment, receiving the following during my attempts:

New-PSSession : [outlook.office365.com] Connecting to remote server outlook.office365.com failed with the following error message:[ClientAccessServer=servername,BackEndServer=servername.prod.outlook.com,RequestId=e6f6b9e7-7c5e-45ec-87fe-59332db1fb95,TimeStamp=8/17/2017 3:16:52 PM] Access Denied For more information, see the about_Remote_Troubleshooting Help topic.

I can use the same account to connect in-browser to http://portal.office.com, and it is set as a Global Administrator in O365, so I know that the account itself has appropriate access.

Interestingly, if I connect with the MFA-supported PowerShell method, with the same account, it connects successfully.

Through testing I’ve determined that using any on-premise account synchronized through Azure AD Connect fails with the same “Access Denied” message, while any cloud-only account connects successfully.

I began to look at our ADFS implementation in UAT since that is a key component for authenticating the on-premise user account. This environment has ADFS 2.0 on Server 2008 R2, which is different than production but shouldn’t be a barrier to connectivity (without MFA).

After comparing the O365 trust configuration and finding no issues, I decided to use the Microsoft Connectivity tool to test. Using the Office 365 Single Sign On test, I saw a failure with this error:

A certificate chain couldn't be constructed for the certificate.
Additional Details
The certificate chain has errors. Chain status = NotTimeValid.

This let me on the path to fixing expired/broken SSL certificates in our UAT ADFS, which I posted about previously here.

Now that the SSL problem is resolved, I attempted to connect to Exchange Online PowerShell again, and was successful!

Looks like this “Access Denied” message was directly related to the expired certificate of the ADFS proxy.


Expand Commvault Disk Library

$
0
0

My Commvault disk library is nearing 90% capacity, which is a growing cause for concern. The disk library is provided by a Dell MD1400 with 12x6TB SAS drives, which was originally configured as a 10 disk RAID6 set with 2 hot spares (~45TB usable) on the PERC H830 card.

As an intermediate step before purchasing an additional disk shelf, I did the following to give a little breathing room.

  1. Using the Dell Open Manage Server Administrator (OMSA), I located one of the hot spare drives and unassigned it.
    Dell OMSA unassign global hot spare
  2. Still within OMSA, I chose the “Reconfigure” option on my Virtual Disk, keeping the RAID level at 6 but adding in the new available capacity.
  3. Then I waited. It took 16 days for the reconfiguration to complete as the RAID6 parity was re-spread/calculated across the set. This left me with a ~50TB virtual disk.
    Dell OMSA virtual disk size
  4. Within Disk Management, I carved the free space into two additional ~3TB volumes, which are mounted within a standard disk library path of L:\DiskLibrary. This size adheres to the recommendations given to us by our professional services partner.
    Disk management showing new volumes
  5. During the original configuration, we used Automated Mount Path Detection, to point to L:\DiskLibrary:
    commvault export storage config example
  6. Due to this, the new mount paths were picked up automatically after about 15 minutes, and appeared within the list of mount paths under the library:
    mount paths on commvault library

Checking the Disk Usage tab on the properties of the library dropped utilization down to 80%, and provided us some time to address the growing data concerns.


Azure PowerShell DNS – Modify TTL

$
0
0

A brief note on modifying TTL on an Azure DNS record set. This is changed on the record set, not the record itself.

The Azure DNS PowerShell docs don’t make it explicitly clear how to do this, however using “help set-AzureRmDnsRecordSet -examples” gave me a clue on how to achieve it.

The key is the middle line here:

$rs = Get-AzureRmDnsRecordSet -Name "msoid" -RecordType CNAME -ZoneName "domain.com" -ResourceGroupName "DNS"
$rs.TTL = 3600
Set-AzureRmDnsRecordSet -RecordSet $rs


Project Honolulu and Server Core

$
0
0

By now many IT administrators have heard of Project Honolulu from Microsoft. I must admit, when I heard the headline and initial talk about it, I book-marked the info intending to come back but didn’t really dig into it. I thought, “oh a revamped Server Manager.”

My perspective is all changed now.

I’m watching the “Windows Server: What’s new and what’s next” session from Ignite 2017. I have been following Aidan Finn’s blogging of Ignite sessions including this one in particular for the “What’s new” session, and recall reading his notes about Server Core being in semi-annual channel, but not Server GUI, so “you better learn some PowerShell to troubleshoot your networking and drivers/firmware”.

But now having watched the session myself, it makes Microsoft’s vision and a path forward here very clear to me.

Using Server Core allows an organization to reduce their surface area for vulnerability, streamline the size/frequency of Windows Updates, optimize performance and scalability on hardware, and stay up to date on the Windows Server cadence.

Project Honolulu makes using Server Core viable. This is the answer to the Windows system administrator saying “Server Core just doesn’t give me the visibility I need into my servers”. As Jeff Woolsey walks through the functions of Project Honolulu, it is obvious that THIS is where the visibility will be; no more RDP into individual servers to manage their roles, devices, and settings. No more MMC windows to open Event Viewer and Shares and other applets.

Now I’m excited.

Quest Data Protection Portal port requirements

$
0
0

Quest has a new Dashboard portal (Data Protection Portal – DPP) for their Rapid Recovery product, found here: https://dataprotection.quest.com

This gives a very nice overview of your environment including Cores, Machines, and Repositories, along with some level of control. Having recently been exposed to the AppAssure/Rapid Recovery product, this is a very welcome addition because the existing tools like the Central Console are very lacking in central management capabilities. I’ll do a write-up of the capabilities of this Dashboard at a later date.

The DPP requires a plugin to be installed on each Core, which will then communicate with Quest. However, I’ve got Cores in an environment with restricted Internet connectivity. Previously firewall rules were enabled to provide connectivity to the Quest License Portal over HTTP/S, but these are not sufficient for access to the new DPP.

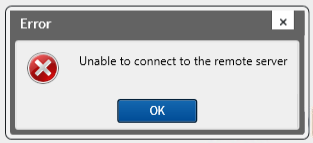
When you try to install the plugin on a Core with limited connectivity, you’ll receive this error before the install wizard appears:

Error for Portal Plugin

Unfortunately, Quest has very little detail on what ports are required, feedback which I’ve already passed along. Their Default Ports page lists connectivity requirements for various functions but not the DPP. In addition, it doesn’t list the destination names or IP in order to isolate outbound HTTP/S even further.

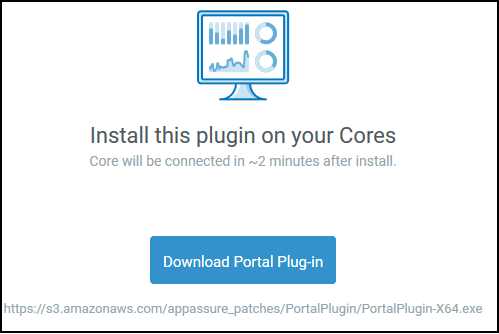
To begin resolving this, I installed WireShark on my Core, began a session, and then attempted to install the Plugin again. Right before the error appeared, I saw DNS request for “s3.amazonaws.com”, and then repeated attempts to an IP over HTTP. I knew I was on the right track because when you download the plugin from the DPP, the link directs to S3:

Plugin download from Quest

I added the FQDN “s3.amazonaws.com” as an address object permitted for outbound HTTP/s access, and attempted to install the plugin again. This time I received a successful prompt to begin the install wizard.

When I run WireShark now, I can see the DNS query, requests for a manifest, and then further on a switch to HTTPs communication (rather than port 80 that it starts with):

Wireshark trace of successful packets

I’d really love to restrict this rule down further than the FQDN of S3, so I’ve opened a case with Quest and will update this post if I get a better option.

Now that the install is done, I went looking at the DPP to ensure my Core was communicating, and found that it was not.

Back to WireShark, I started another session and saw a different set of traffic:

Wireshark trace of DPP communication

A DNS request for “api.licenseportal.com” is completed, and then HTTPs communication that is pretty clearly traffic to the DPP. If one does a reverse DNS lookup on “dataprotection.quest.com” you get an Azure-bound IP address (related to the CNAME resolution in the screenshot above), and if you hit the resolved IP in a browser, you get a certificate warning with a wildcard cert for *.licenseportal.com which is a known Quest domain name.

I added this as an additional FQDN object, and now the Core is displaying data within the DPP. I have now removed the S3.amazonaws.com permission as it is only apparently necessary for the installation.

Rapid Recovery – Force Snapshot selection empty

$
0
0

Using Rapid Recovery 6.1.3, on a Core protecting agents with a very low SLA, I wanted to take a manual snapshot.

When I went to do so, I found the selection list empty.


This is because none of the volumes on the agent were scheduled for protection.

I temporarily added a schedule, forced a snapshot, and then removed the schedule.

I think this is terrible design – there are legitimate reasons to avoid a schedule for some resources, and requiring configuration changes in order to instigate a snapshot introduces risk to un-managed change in an environment.

It goes further though; as this KB indicates, when you have volumes all scheduled and want just a single volume snapshot, you have to remove the schedule (better hope you took note of the settings) and then re-add it afterwards.

There are many little things like this I’ve seen in the AppAssure/Rapid Recovery product since being introduced to it that are quickly souring my opinion, especially coming from a Commvault environment which is extremely flexible and powerful.


Intel Network Connections (ProSet) update or removal

$
0
0

Short-version: be very careful removing the Intel Network Connections software!

I’m working on a task to update NIC drivers and firmware on a Dell PowerEdge R630. It was decided during this process to remove the Intel ProSet software along with it’s generated sub-interfaces for VLAN purposes, and instead utilize switch-port configuration.

I went to uninstall Intel(R) Network Connections from appwiz.cpl, which contains ProSet. On this server, its version was 19.3.0.0. However, I quickly received an error stating that I needed to remove any Teams and VLANs. No problem, I was going to do that anyways so I went into the advanced properties of my NICs and removed the VLAN sub-interface. I wasn’t using any Intel teaming, but rather LFBO within Windows Server.

When I tried again, it still gave me the same error. I decided to try “Modify” on the uninstaller instead, and remove ProSET only.

This was successful, but then when I tried to install the latest version, it said it couldn’t update with this error:
Product: Intel(R) Network Connections — The installed version of Intel(R) Network Connections is not supported for upgrades. You must uninstall it before installing this version.

So I tried the full uninstall again, and this time it worked! Great, I’m thinking “Now I can proceed with the latest version”.

Except it removed ALL NIC config, including IP settings and advanced properties like Jumbo Frames and RSS buffer sizes.

Thankfully I had good documentation of the previous setup, and that should be your biggest takeaway if you’re reading this: always consider “what’s the worst that could happen” and then plan to mitigate that thing.

For future hosts, I left the old version of the software installed and manually updated drivers from the .INF files. Interesting to note, if you already have a higher version installed like Version 22.7, this behavior isn’t seen – you can install an update on top of it without having to uninstall.


Update drive label with no letter

$
0
0

In the process of re-organizing naming structure of a set of Cluster Shared Volumes, I had a need to rename the volume upon an iSCSI disk that was presented to the cluster.

Originally I sourced this article which requires a drive letter associated with the volume in order to find the proper object.

Following that, I came across this article which had the syntax I needed in the last post.

Here’s the script I used successfully:

$drive = gwmi win32_volume -filter "Label = 'Old Name'"
$drive.Label = "New Name"
$drive.put()

Update Quest RapidRecovery Agents silently

$
0
0

I’m in the process of upgrading AppAssure 5.4.3 agents to the latest version of Rapid Recovery, 6.1.3. This is done following the Core upgrade.

So far my progress has been pretty seamless. In testing I confirmed that I could push the install with a “No Reboot” force, and the agent would continue to operate normally until the next system reboot (which will occur as part of monthly Windows Updates).

This script is in no way ‘complete’, as in it could be made much better. Additional logging on success or failure, parallel processing, etc could all be done -however for simple purposes it worked quite well.

# begin a transcript to log the output to file
Start-Transcript C:\Temp\AgentUpgradeLog.txt
# Define the list of systems to update
# Gather list of older version from Rapid Recovery Licensing Portal
$systems = Get-Content -Path C:\Temp\AgentServers.txt

foreach($system in $systems) {
#Write-Host "Testing connectivity to $system"
$rtn = Test-Connection -CN $system -Count 1 -BufferSize 16 -Quiet

IF($rtn -match 'True'){
 Write-Host "ALIVE - $System"
 copy C:\Temp\Agent-X64-6.1.3.100.exe \\$system\c$\temp -confirm:$false
 $executable = "C:\temp\Agent-X64-6.1.3.100.exe"
 $session = New-PSSession -ComputerName $system
 # Key here is the /silent and reboot=never switches
Invoke-Command -Session $session -ScriptBlock {Start-Process $using:executable -ArgumentList "/silent reboot=never" -Wait}
 remove-pssession $session
 Write-Host "$System - upgrade steps completed"
 sleep 5
# Found that we had agent services not starting following the upgrade
 get-service -name "RapidRecoveryAgent" -computername $system | Start-Service
 }

else
 {
 Write-Host "DOWN - $System"
 }

}

Stop-Transcript


AppAssure Agent service not started

$
0
0

I have found in recent experience that the Quest RapidRecovery/AppAssure agent service frequently fails to start within the default Windows service startup timer (30 seconds).

I don’t believe this is simply my environment, as Quest has a knowledge article specifically addressing the problem.

This issue poses a problem especially after Windows Updates maintenance windows, because our hundreds of virtual machines will reboot, leaving our monitoring system with hundreds of alerts of stopped services, and many failed backups.

Unfortunately, Quest’s recommendation to simply increase the services startup timeout is system-wide, and not something I was willing to apply in full across my entire environment.

My first thought was to utilize the Recovery options with the Windows service, but upon quick inspection its clear this is only for failed services, and a service that isn’t started does not fall into that category.

Instead I decided to set a GPO with a service preference, with service action set to “Start Service”. This way, every time Group Policy is refreshed, if the service isn’t running it will be started.

The GPO itself has a bit of logic to address the AppAssure/Rapid Recovery upgrade we’re going through right now, which results in a service name change for the agent.

To accomplish this, I created two separate service preferences, each with some item-level targetting for registry matching to ensure it only applies if that service does exist (to avoid spamming Event Logs). This takes advantage of the fact that the AppAssure Agent doesn’t record a product version in the registry:

AppAssure Service

  • Service Name = AppAssureAgent
  • Match if KeyExists HKLM\Software\AppRecovery\Agent
  • AND if not ValueExists HKLM\Software\AppRecovery\Agent\ProductVersion

Rapid Recovery Service

  • Service Name = RapidRecoveryAgent
  • Match if ValueExists HKLM\Software\AppRecovery\Agent\ProductVersion

Terraform – first experience

$
0
0

Having access to an Azure credit through my workplace, I’ve begun training and testing various things within Azure, and recently I was looking at ARM templates for VM deployment. This research led me to stumble across Terraform as an infrastructure-as-code deployment tool.

I started messing around with Terraform to deploy a basic set of Azure resources using these two guides:

Using Peter’s example was great, although I had to make a few tweaks since the module syntax has changed. In the near future I’ll post a full example of what I used recently for my first template. Terraform documentation has been excellent as I’ve worked through syntax and various examples, which is a great surprise.

I’ve found that I appreciate building a template in Terraform much more than an ARM template. Part of this is the easier syntax and readability, and the logical manner that I’ve seen others use Terraform .tf files for segregating resource deployment.

I think that the other primary factor is because declarative Terraform is what I’ve seen referred to as “idempotent” – a new word for me I’ve only ever seen used in this context. The answer on this StackOverflow question gives a great description of this context, and its clearly descriptive of how Terraform operates.

If I build an ARM template and apply it, it will deploy the resource as I’ve described it. And then if I apply that template again, it will attempt to build another of that resource. And if I modify the template and apply it again, it will attempt to create that slightly modified resource, leaving me with 3 different resources.

Terraform instead gives the ability to declare “what I want it to look like”, and ensures that the actual state matches the declared state. There are genuinely good reasons to use both approaches but right now this idempotent-style of deployment is new and attractive to me.

Soon on the horizon in my sandbox is to utilize remote state in an Azure blob storage to facilitate team work within one environment.

Azure SkuNotAvailable during Terraform apply

$
0
0

I ran into some issues when actually attempting to apply my first Terraform template, specifically errors related to the location I had chosen:

* azurerm_virtual_machine.test: compute.VirtualMachinesClient#CreateOrUpdate:
Failure sending request: StatusCode=409 -- 
Original Error: failed request: autorest/azure: Service returned an error. 
Status=<nil> Code="SkuNotAvailable" 
Message="The requested size for resource '/subscriptions/f745d13d/resourceGroups/HelloWorld/providers/Microsoft.Compute/virtualMachines/helloworld' is currently not available in location 'WestUS' zones '' for subscription 'f745d13d'. 
Please try another size or deploy to a different location or zones. 
See https://aka.ms/azureskunotavailable for details."

This didn’t make much sense to me, because I was using a very normal VM size (like Standard_A2 or something) and it was definitely available in WestUS.

The key to solving was when I use the Azure Shell (powershell) to run this:

Get-AzureRmComputeResourceSku | where {$_.Locations.Contains("WestUS")}

The output of this command:

Displays azure locations for my subscription

Turns out for my Subscription (Visual Studio Enterprise – MPN), WestUS is restricted to very few VM sizes (note the “NotAvailableForSubscription” items). When I target WestUS2 or EastUS, then there’s quite a bit more choice.

Terraform – Import Azure Resources

$
0
0

One of the first uses I’ll have for Terraform in my work will be adding resources to an existing environment – an environment for which Terraform has no state information. This means when I’m declaring the new VMs and want to tie it to a Resource Group, Terraform won’t have a matching resource for that.

Today I’ve been playing around with Terraform import in my sandbox to become familiar with the process. In my sandbox I have an existing Resource Group, Virtual Network, and Subnet. I intended to add a simple network interface, tied to an already-existing subnet.

To begin, I declared my existing resources in my .TF file as I would want them to exist (technically matching how they exist right now):

resource "azurerm_resource_group" "Client_1" {  
 name = "Client_1"
 location = "${var.location}"
 }

resource "azurerm_virtual_network" "Client1Network" {
 name = "Client1Network"
 address_space = ["10.1.0.0/16"]
 location = "${var.location}"
 resource_group_name = "${azurerm_resource_group.Client_1.name}"
 }

resource "azurerm_subnet" "Web" {
 name = "Web"
 resource_group_name = "${azurerm_resource_group.Client_1.name}"
 virtual_network_name = "${azurerm_virtual_network.Client1Network.name}"
 address_prefix = "10.1.10.0/24"
 }

Then for each of them I gathered the Resource ID in Azure. For the resource group and virtual network this was simple enough; find the Properties pane and copy the string that was there:

For the Subnet, there wasn’t an easy GUI reference that I could find, so I turned to Azure PowerShell, which output the ID I needed:

$vmnet = get-azurermVirtualnetwork | where {$_.Name -eq "Client1Network" }

get-azurermvirtualnetworksubnetconfig -virtualnetwork $vmnet

Then I used the Terraform “import” command along with the resource declaration and name in my file, and the resource ID from Azure:

terraform import azurerm_resource_group.Client_1 /subscriptions/f745d13d/resourceGroups/Client_1/providers/Microsoft.Network/virtualNetworks/Client1Network

I repeated the process for the resource group, virtual network, and subnet.

Then I added the resource declartaion in my .TF file for the network interface I wanted to add:

resource "azurerm_network_interface" "testNIC" {
 name = "testNIC"
 location = "${var.location}"
 resource_group_name = "${azurerm_resource_group.Client_1.name}"
 ip_configuration {
 name = "testconfiguration1"
 subnet_id = "${azurerm_subnet.Web.id}"
 private_ip_address_allocation = "dynamic"
 }
}

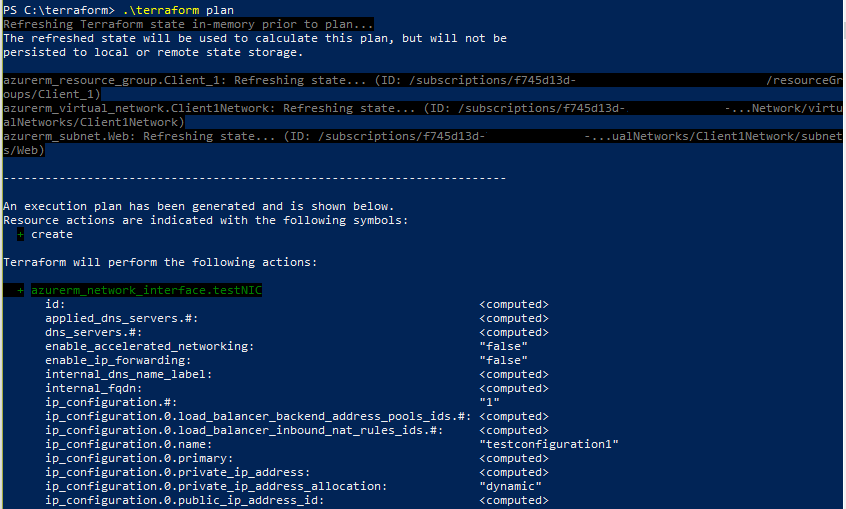
Then I performed a “terraform plan”, which showed me the resource it detected needing to be created:


Once I completed the “terraform apply”, the resource was created and visible within my Azure portal.


ARM Template – reference existing resources

$
0
0

Despite being a rather organized person in my professional life, I begin learning new topics and technologies in quite the opposite manner.

As I begin to dive into Azure automation, today I wanted to understand the proper syntax to deploy small resources with an ARM template while referencing existing resources, rather than what is declared and built within the JSON file itself.

This Azure Quickstart template was very valuable as I spent some time exploring this.

The basic idea:

  • Virtual Network and Subnet already exist
  • Add Network Interface through ARM template

Once I wrapped my head around the proper way to input the names of existing resource group, virtual network, and subnet, it all kind of clicked for me.

Resource Group is defined during the PowerShell command that calls the JSON file (I’ll show this at the bottom of this post). Parameters are built to accept simple text strings of the virtual network name and subnet name that I’m targeting. Then I used these parameters to build a variable for the subnet, and used that variable in the resource declaration for the network interface.

Here’s the JSON:

{
    "$schema": "https://schema.management.azure.com/schemas/2015-01-01/deploymentTemplate.json#",
    "contentVersion": "1.0.0.0",
    "parameters": {
        "virtualNetworkName": {
            "type": "string",
            "metadata": {
                "description": "Type existing virtual network name"
            }
        }
        ,"subnetName": {
            "type": "string",
            "metadata": {
                "description": "Type existing Subnet name"
            }
        }
    },
    "variables": {
        ,"subnetRef": "[resourceID('Microsoft.Network/virtualNetworks/subnets', parameters('virtualNetworkName'), parameters('subnetName'))]"
    },
    "resources": [
        {
            "apiVersion": "2015-06-15",
            "type": "Microsoft.Network/networkInterfaces",
            "name": "WindowsVM1-NetworkInterface",
            "location": "[resourceGroup().location]",
            "tags": {
                "displayName": "WindowsVM1 Network Interface"
            },
            "properties": {
                "ipConfigurations": [
                    {
                        "name": "ipconfig1",
                        "properties": {
                            "privateIPAllocationMethod": "Dynamic",
                            "subnet": {
                                "id": "[variables('subnetRef')]"
                            }
                        }
                    }
                ]
            }
        }

    ],
    "outputs": {}
}
To deploy this, I make a connection to Azure PowerShell, and ran:
New-AzureRmResourceGroupDeployment -ResourceGroupName "Group1" -TemplateFile "C:\Azure\Templates\NewSubnet.json"
This prompts me for my two parameters, which I could set defaults for in the JSON or provide a parameter file and use that in the deployment command as well.
Next up – deploy a full VM with managed disks attaching to existing resources, and then working into Desired State Config.

Terraform – Simple virtual machine

$
0
0

As mentioned on my Terraform – First Experience post, I began with a very simple set of resources to stand up a single virtual machine.

The following can be placed into a .TF file, and used right away with “terraform plan” and “terraform apply”. This would be much more useful if every resource wasn’t named “test”, but for the purposes of walking through each resource, understanding the structure of variables and dependency syntax its a good beginning.

provider "azurerm" {
  subscription_id = "f745d13d"
  client_id       = "7b011238"
  client_secret   = "fhSZ6YN"
  tenant_id       = "461b7ed5"
}

variable "location" { default = "EastUS" }
variable "username" { default = "adminuser" }
variable "password" { default = "password" }

resource "azurerm_resource_group" "test" {
  name     = "HelloWorld"
  location = "${var.location}"
}

resource "azurerm_virtual_network" "test" {
  name                = "test"
  address_space       = ["10.0.0.0/16"]
  location            = "${var.location}"
  resource_group_name = "${azurerm_resource_group.test.name}"
}
 
resource "azurerm_subnet" "test" {
  name                 = "test"
  resource_group_name  = "${azurerm_resource_group.test.name}"
  virtual_network_name = "${azurerm_virtual_network.test.name}"
  address_prefix       = "10.0.2.0/24"
}
 
resource "azurerm_network_interface" "test" {
  name                = "test"
  location            = "${var.location}"
  resource_group_name = "${azurerm_resource_group.test.name}"
  ip_configuration {
    name                          = "testconfiguration1"
    subnet_id                     = "${azurerm_subnet.test.id}"
    private_ip_address_allocation = "dynamic"
  }
}
 
resource "azurerm_storage_account" "test" {
  name                = "helloworlduniquenumbers"
  resource_group_name = "${azurerm_resource_group.test.name}"
  location            = "${var.location}"
  account_replication_type  = "LRS"
  account_tier        = "Standard"
}
 
resource "azurerm_storage_container" "test" {
  name                  = "helloworld"
  resource_group_name   = "${azurerm_resource_group.test.name}"
  storage_account_name  = "${azurerm_storage_account.test.name}"
  container_access_type = "private"
}
 
resource "azurerm_virtual_machine" "test" {
  name                  = "helloworld"
  location              = "${var.location}"
  resource_group_name   = "${azurerm_resource_group.test.name}"
  network_interface_ids = ["${azurerm_network_interface.test.id}"]
  vm_size               = "Standard_A1"
  
  storage_image_reference {
    publisher = "MicrosoftWindowsServer"
    offer     = "WindowsServer"
    sku       = "2016-Datacenter"
    version   = "latest"
  }
 
  storage_os_disk {
    name          = "myosdisk1"
    vhd_uri       = "${azurerm_storage_account.test.primary_blob_endpoint}${azurerm_storage_container.test.name}/myosdisk1.vhd"
    caching       = "ReadWrite"
    create_option = "FromImage"
  }
 
  os_profile {
    computer_name  = "helloworld"
    admin_username = "${var.username}"
    admin_password = "${var.password}"
  }

  os_profile_windows_config {
    provision_vm_agent = true
    enable_automatic_upgrades = true
  }
 
}

ARM Template to Azure Automation DSC

$
0
0

Either my google skills are deteriorating, or getting an ARM Template virtual machine connected to an Azure Automation DSC node configuration through the DSC extension is both not obvious and poorly documented.

I came across two different ways of achieving my goal, which was to run a single PowerShell command consisting of “New-AzureRmResourceGroupDeployment” with a template file and parameter file, and have it both deploy the resources, install the DSC extension, assign it to a node configuration, and bring it into compliance.

The first is in the official documentation, referenced here as Automation DSC Onboarding. Within that article, it provides this GitHub quick start template as the reference. With this template, you specify your external Automation URL directly, along with the Key to authorize the connection, and then a method to grab the “UpdateLCMforAAPull” configuration module needed, which in this case comes from the raw github repository, although I’ve seen other examples of storing it in a private Storage Account blob.

Interestingly, as of the time I’m writing this post, that GitHub page has been updated to reflect it is no longer necessary – this was not the case as I worked through this problem.

During this investigation I came across this feedback article relating to connecting an ARM deployment to Azure Automation DSC. This linked to a different GitHub quick start template which is similar but has syntax to pull the Automation URL and Key from a referenced lookup rather than statically set, and removes the need for definition of the extra configuration module. That feedback article also gives some insight into why the documentation and code examples floating around are confusing – being in a state of transition has that effect.

Two very important lessons I learned once I hit on an accurate template and began testing:

First: Using the second (more recent) example, your Automation account must be in the same resource group that you’re deploying other resources to, because within the resource template for the Automation Account, there isn’t a value for Resource Group. Perhaps this is my inexperience with ARM but looking at the API reference gives no indication this is possible, and when I had a mismatch it produced unavoidable errors.

Secondly: Watch out for Node Configuration case mismatch – as in upper vs lower case. My node configuration was compiled using configuration data, so it was named in the format <ConfigName>.<virtualMachineName>, with <virtualMachineName> being all lowercase. However when I used parameter values in my JSON file to reference that node configuration, it was done with mixed case.

The result of this was that the virtual machine would get deployed successfully, as would the DSC extension. It would begin applying the DSC configuration according to the logs, and running “Get-AzureRmAutomationDSCNode” listed my nodes with check-in timestamps and a status of “Compliant”. However, these nodes would NOT appear in the Portal under “DSC Nodes”. I suspect this is related to the filtering happening at the top of the page, where it pre-selects all node configurations (which are lower case) and thus the filter doesn’t match.

Once I corrected this in my template and re-ran the deployment, they appeared properly in the GUI.


For anyone else looking to achieve this, here’s my config (this is a single VM and VNIC attaching to a pre-existing subnet in Azure):

Parameter.JSON file:

{
    "$schema": "https://schema.management.azure.com/schemas/2015-01-01/deploymentTemplate.json#",
    "contentVersion": "1.0.0.0",
    "parameters": {
        "ClientCode": {
            "value": "ABCD"
        },
        "TimeZone": {
            "value": "Central Standard Time"
        },
        "ProdWeb": {
            "value": {
                "StaticIP": "10.7.12.212",
                "VMSize": "Standard_A1_V2",
                "NameDigit": "2"
            }
        }
        "ProdWebPassword": {
            "reference": {
                "keyVault": {
                    "id": "/subscriptions/insertsubscriptionID/resourceGroups/insertResourceGroupName/providers/Microsoft.KeyVault/vaults/VaultName"
                },
                "secretName": "ProdWeb-Admin"
            }
        }
    }
}

Deployment.JSON file:

{
    "$schema": "https://schema.management.azure.com/schemas/2015-01-01/deploymentTemplate.json#",
    "contentVersion": "1.0.0.0",
    "parameters": {
        "ClientCode": {
            "type": "string",
            "metadata": {
                "description": "Client Code to be used for Deployment (uppercase)"
            }
        },
        "TimeZone": {
            "type": "string",
            "metadata": {
                "description": "Define the time zone to apply to virtual machines"
            }
        },
        "windowsOSVersion": {
            "defaultValue": "2012-R2-Datacenter",
            "allowedValues": [
                "2012-R2-Datacenter",
                "2016-Datacenter"
            ],
            "type": "string",
            "metadata": {
                "description": "The Windows version for the VM. "
            }
        },
        "ProdWeb": {
            "type": "object",
            "metadata": {
                "description": "Object parameter containing information about PextWeb2 virtual machine"
            }
        }
        "ProdWebPassword": {
            "type": "securestring"
        }
    },
    "variables": {
        "ProdWebName": "[concat('AZ',parameters('ClientCode'),'ProdWeb', parameters('ProdWeb').NameDigit)]",
        "virtualNetwork": "[resourceID('Microsoft.Network/virtualNetworks', concat('AZ',toupper(parameters('ClientCode'))))]",
        "Subnet-Prod-Web-Servers": "[concat(variables('virtualNetwork'),'/Subnets/', concat('AZ',toupper(parameters('ClientCode')),'-Prod-Web-Servers'))]",
        "AdminUser": "ouradmin",
        "storageAccountType": "Standard_LRS",
        "automationAccountName": "AutomationDSC",
        "automationAccountLocation": "EastUS2",
        "ConfigurationName": "ProdWebConfig",
        "configurationModeFrequencyMins": "240",
        "refreshFrequencyMins": "720"
    },
    "resources": [
        {
            "comments": "Automation account for DSC",
            "apiVersion": "2015-10-31",
            "location": "[variables('automationAccountLocation')]",
            "name": "[variables('automationAccountName')]",
            "type": "Microsoft.Automation/automationAccounts",
            "properties": {
                "sku": {
                    "name": "Basic"
                }
            }
        },
        {
            "comments": "VNIC for ProdWeb",
            "apiVersion": "2017-06-01",
            "type": "Microsoft.Network/networkInterfaces",
            "name": "[concat(variables('ProdWebName'),'nic1')]",
            "location": "[resourceGroup().location]",
            "properties": {
                "ipConfigurations": [
                    {
                        "name": "ipconfig1",
                        "properties": {
                            "privateIPAllocationMethod": "Static",
                            "privateIPAddress": "[parameters('ProdWeb').StaticIP]",
                            "subnet": {
                                "id": "[variables('Subnet-Prod-Web-Servers')]"
                            }
                        }
                    }
                ]
            }
        },
        {
            "comments": "Disk E for ProdWeb",
            "type": "Microsoft.Compute/disks",
            "name": "[concat(variables('ProdWebName'),'_E')]",
            "apiVersion": "2017-03-30",
            "location": "[resourceGroup().location]",
            "properties": {
                "creationData": {
                    "createOption": "Empty"
                },
                "diskSizeGB": 64
            },
            "sku": {
                "name": "[variables('storageAccountType')]"
            }
        },
        {
            "comments": "VM for ProdWeb",
            "type": "Microsoft.Compute/virtualMachines",
            "name": "[variables('ProdWebName')]",
            "apiVersion": "2017-03-30",
            "location": "[resourceGroup().location]",
            "properties": {
                "hardwareProfile": {
                    "vmSize": "[parameters('ProdWeb').VMSize]"
                },
                "osProfile": {
                    "computerName": "[variables('ProdWebName')]",
                    "adminUsername": "[variables('AdminUser')]",
                    "adminPassword": "[parameters('ProdWebPassword')]",
                    "windowsConfiguration": {
                        "enableAutomaticUpdates": false,
                        "provisionVMAgent": true,
                        "timeZone": "[parameters('TimeZone')]"
                    }
                },
                "storageProfile": {
                    "imageReference": {
                        "publisher": "MicrosoftWindowsServer",
                        "offer": "WindowsServer",
                        "sku": "[parameters('windowsOSVersion')]",
                        "version": "latest"
                    },
                    "osDisk": {
                        "name": "[concat(variables('ProdWebName'),'_C')]",
                        "createOption": "FromImage",
                        "diskSizeGB": 128,
                        "caching": "ReadWrite",
                        "osType": "Windows",
                        "managedDisk": {
                            "storageAccountType": "[variables('storageAccountType')]"
                        }
                    },
                    "dataDisks": [
                        {
                            "lun": 0,
                            "createOption": "Attach",
                            "caching": "ReadWrite",
                            "managedDisk": {
                                "id": "[resourceId('Microsoft.Compute/disks', concat(variables('ProdWebName'),'_E'))]"
                            }
                        }
                    ]
                },
                "networkProfile": {
                    "networkInterfaces": [
                        {
                            "id": "[resourceId('Microsoft.Network/networkInterfaces',concat(variables('ProdWebName'),'nic1'))]"
                        }
                    ]
                },
                "diagnosticsProfile": {
                    "bootDiagnostics": {
                        "enabled": false
                    }
                }
            },
            "dependsOn": [
                "[concat('Microsoft.Network/networkInterfaces/', concat(variables('ProdWebName'),'nic1'))]",
                "[concat('Microsoft.Compute/disks/', concat(variables('ProdWebName'),'_E'))]"
            ]
        },
        {
            "comments": "DSC extension config for ProdWeb",
            "type": "Microsoft.Compute/virtualMachines/extensions",
            "name": "[concat(variables('ProdWebName'),'/Microsoft.Powershell.DSC')]",
            "apiVersion": "2017-03-30",
            "location": "[resourceGroup().location]",
            "dependsOn": [
                "[concat('Microsoft.Compute/virtualMachines/', variables('ProdWebName'))]"
            ],
            "properties": {
                "publisher": "Microsoft.Powershell",
                "type": "DSC",
                "typeHandlerVersion": "2.75",
                "autoUpgradeMinorVersion": true,
                "protectedSettings": {
                    "Items": {
                        "registrationKeyPrivate": "[listKeys(resourceId('Microsoft.Automation/automationAccounts/', variables('automationAccountName')), '2015-01-01-preview').Keys[0].value]"
                    }
                },
                "settings": {
                    "Properties": [
                        {
                            "Name": "RegistrationKey",
                            "Value": {
                                "UserName": "PLACEHOLDER_DONOTUSE",
                                "Password": "PrivateSettingsRef:registrationKeyPrivate"
                            },
                            "TypeName": "System.Management.Automation.PSCredential"
                        },
                        {
                            "Name": "RegistrationUrl",
                            "Value": "[reference(concat('Microsoft.Automation/automationAccounts/', variables('automationAccountName'))).registrationUrl]",
                            "TypeName": "System.String"
                        },
                        {
                            "Name": "NodeConfigurationName",
                            "Value": "[concat(variables('ConfigurationName'),'.',tolower(variables('ProdWebName')))]",
                            "TypeName": "System.String"
                        },
                        {
                            "Name": "ConfigurationMode",
                            "Value": "ApplyandAutoCorrect",
                            "TypeName": "System.String"
                        },
                        {
                            "Name": "RebootNodeIfNeeded",
                            "Value": true,
                            "TypeName": "System.Boolean"
                        },
                        {
                            "Name": "ActionAfterReboot",
                            "Value": "ContinueConfiguration",
                            "TypeName": "System.String"
                        },
                        {
                            "Name": "ConfigurationModeFrequencyMins",
                            "Value": "[variables('configurationModeFrequencyMins')]",
                            "TypeName": "System.Int32"
                        },
                        {
                            "Name": "RefreshFrequencyMins",
                            "Value": "[variables('refreshFrequencyMins')]",
                            "TypeName": "System.Int32"
                        }
                    ]
                }
            }
        }
    ],
    "outputs": {}
}


Terraform – Variables in resource names

$
0
0

This is a post about resource naming in Terraform. As I was working on my first production use of Terraform to deploy resources to Azure, my goal was to parameterize the resource so that in the future I could easily re-use the .TF file with a simple replacement of my .TFVARS file.

I struggled for a while because I was trying to do something like this:

resource "azurerm_virtual_network" "AZ${var.clientcode}Net" {
  name                = "AZ${var.clientcode}"
  address_space       = ["${lookup(var.networkipaddress, "AZ${var.clientcode}")}"]
  location            = "${var.location}"
  resource_group_name = "${azurerm_resource_group.Default.name}"
  dns_servers         = "${var.dnsservers}"
}

Effectively, I wanted my resource to result in something like “AZABCNet” both in the name property and the resource identifier as well.
Then I would try and reference that in a different resource attribute, for a subnet like this:

virtual_network_name = "${azurerm_virtual_network.AZ${var.clientcode}Net.name}"

However, this gave me errors when trying to validate:

Error: Error loading C:\terraform\ABC\ABC_Network.tf: Error reading config for azurerm_subnet[${var.location}]: parse error at 1:28: expected expression but found invalid sequence "$"


My assumption of how the resource identifier worked was incorrect thinking; resource names should be local and static, as described here on StackOverflow.

This means that I can give my resource an identifier as “AZClientNet”, since that is used only within Terraform while the Name attribute is what will become the deployed name in Azure.


This leaves a little bit of a gap where I might want a resource declared with multiples of something, with attributes defined in a map variable, without having to declare multiple resource blocks.

It appears this functionality is coming in Terraform in the form of a “for each” function, according to this Github discussion. Not having used the proposed syntax in a test environment, I don’t fully have my head around it.

Get Inner Error from Azure RM command

$
0
0

Today I’m working on an ARM Template to deploy some resources into an Azure subscription. After building my JSON files and prepping parameters, I used the cmdlet “Test-AzureRmResourceGroupDeployment” in order to validate my template.

This failed with the error:

Code    : InvalidTemplateDeployment
Message : The template deployment 'e76887a9' is not valid according to the validation
          procedure. The tracking id is '6df0fffb'. See inner errors for details. Please
          see https://aka.ms/arm-deploy for usage details.
Details : {Microsoft.Azure.Commands.ResourceManager.Cmdlets.SdkModels.PSResourceManagerError}

I found that decidedly unhelpful, but found an effective way to determine the actual error message.

To retrieve the error details, use the following cmdlet, where the CorrelationID equals the tracking ID mentioned in the error.

get-azurermlog -correlationid 6df0fffb -detailedoutput

This will produce output which you can investigate and determine where the error lies.

In my case, I needed to create a Core quota increase request with Azure support, as my subscription had reached it’s limit.

Viewing all 108 articles
Browse latest View live